Easy
Cupcake Bouquet Tutorial
with Video
- Home Page
- Flower Cakes
- Cupcake Bouquet
THIS POST MAY CONTAIN AFFILIATE LINKS, WHICH MEANS I’LL RECEIVE A COMMISSION IF YOU PURCHASE THROUGH MY LINKS, AT NO EXTRA COST TO YOU. PLEASE READ PRIVACY POLICY AND DISCLOSURE FOR MORE INFORMATION.
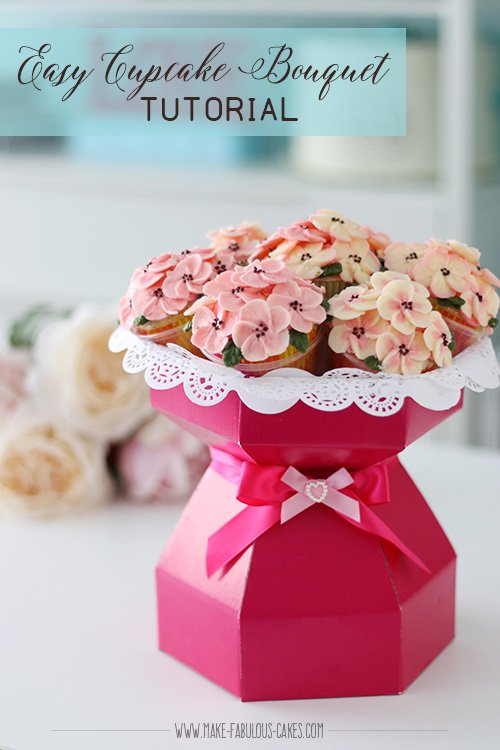
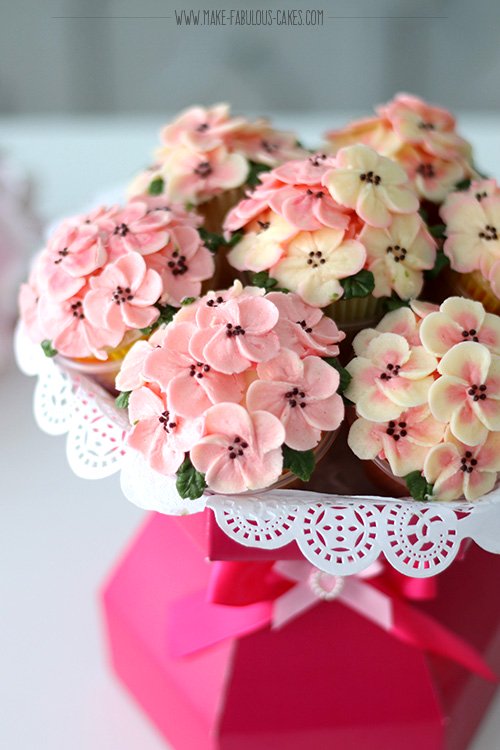
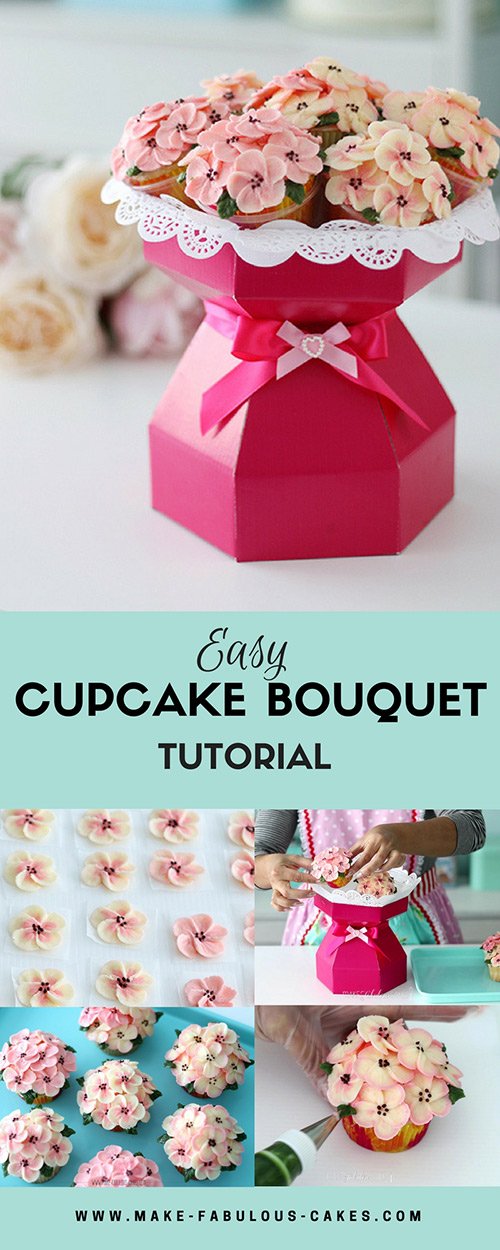
This cupcake bouquet tutorial will show you how to make an easy arrangement of buttercream flowers. So, you can say it with flowers and eat it too!
Valentine’s is just around the corner, and it is flower giving season again.
This bouquet of flowers is a gift that keeps on giving, it’s three gifts all in one!
First the recipient gets a lovely bouquet of flowers.
Secondly, not only do they have a something beautiful to look at, but wait, they can eat it too?! Yep, because our flowers are of the edible kind, it’s made out of luscious buttercream.
Then, when they finished up their cupcakes (and hopefully they will share), they will see another surprise. Chocolates!
I think, whoever will receive this gift will feel extra special.
Watch this video and you will see how easy it is to make this cupcake flower bouquet.
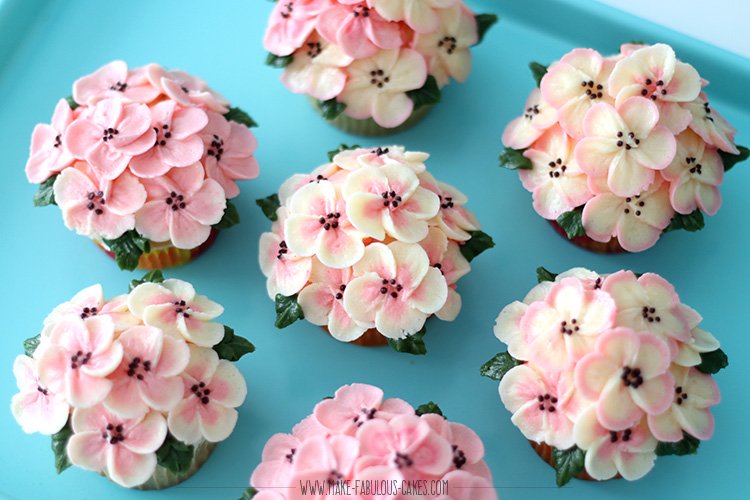
Buttercream Blossoms Cupcake
This cupcake bouquet will need 7 cupcakes. I used my yummy Ultimate Vanilla Cupcake recipe for this one.
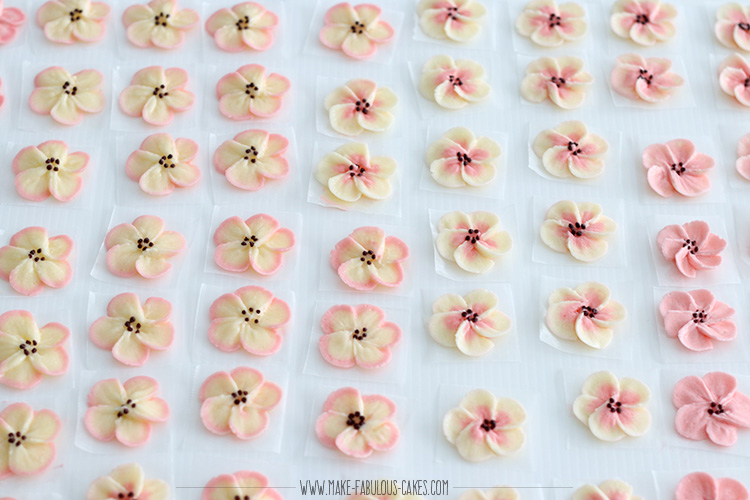
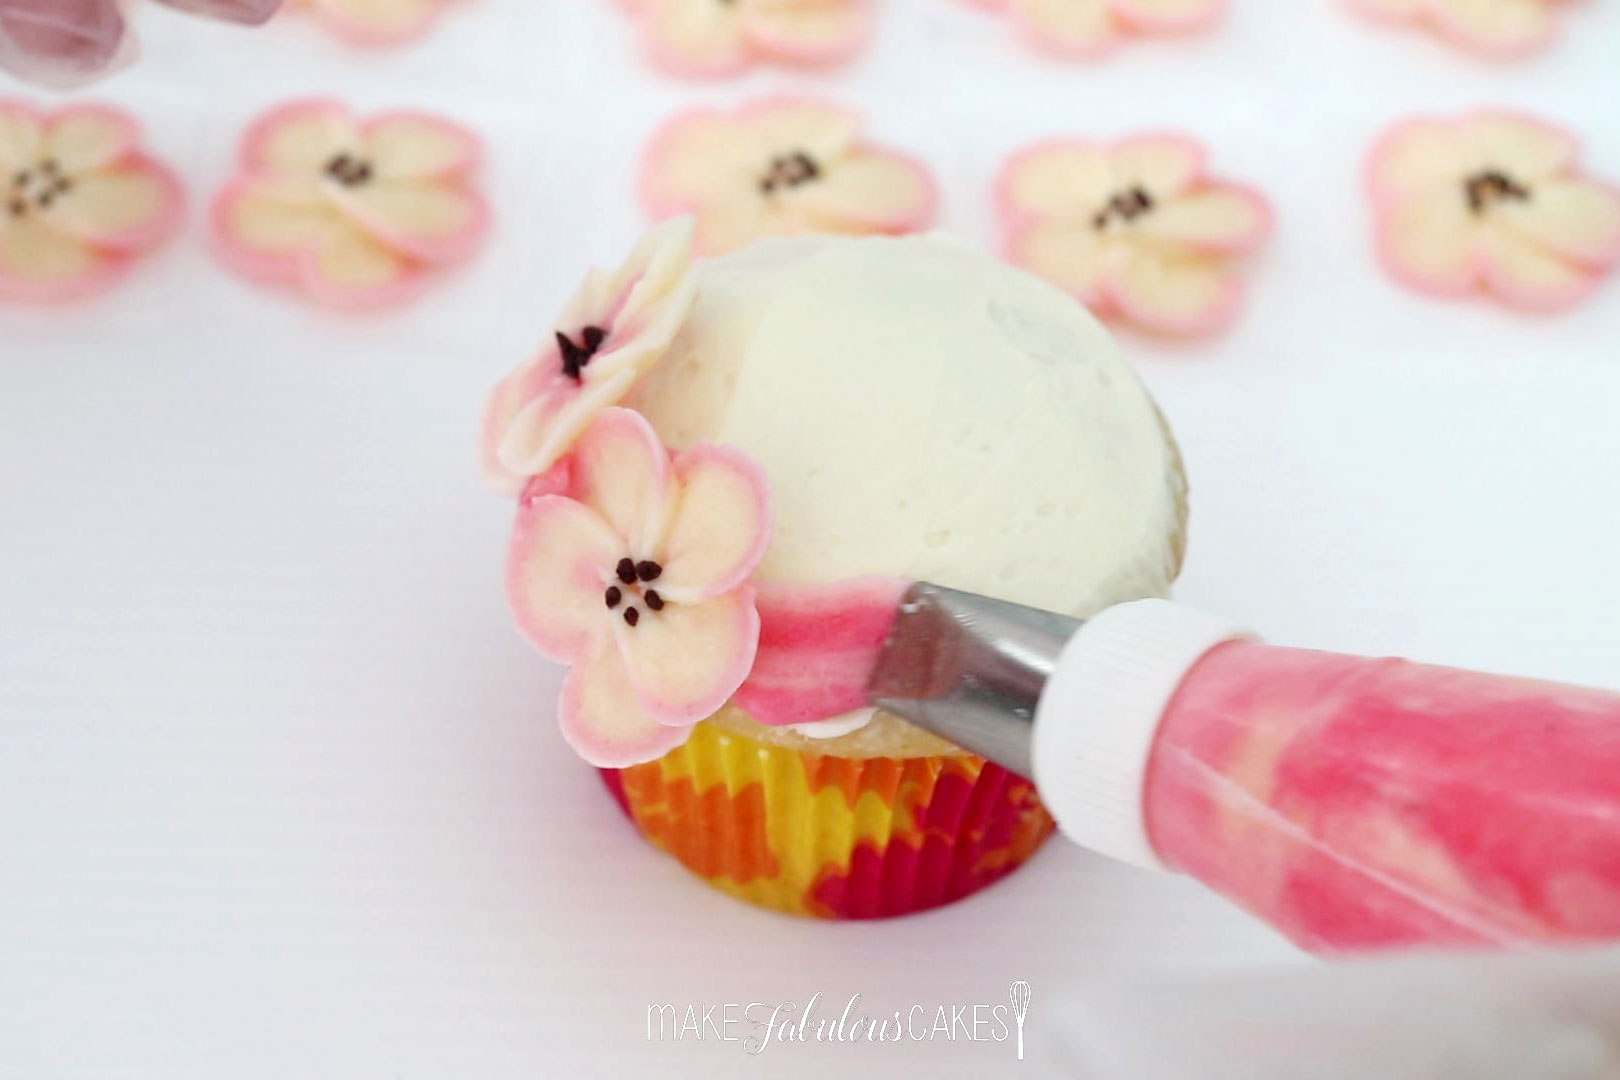
To make the blossoms, I used pastry tip 104 using the Italian Meringue buttercream. To make it more interesting and give the flowers more depth, I used two colours of buttercream inside the pastry bag.
First, I striped it with some pink on one side then I filled the rest of the pastry bag with some uncoloured buttercream. You can change up the position of the tip so you can get different colour effects when you pipe the petals of the flowers.
I piped the flowers on a piece of wax paper on the flower nail then carefully transferred it on a cake board. Then I proceeded to make more… a lot more actually. Each cupcake would need about 10 blossoms. When I was doing this, I was wishing that I could just copy and paste it.
When all the buttercream blossoms are done and on the board, I placed it in the freezer for about 20 minutes to let it firm up.
In the meantime, I frosted the cupcakes very lightly with some buttercream using a small spatula.
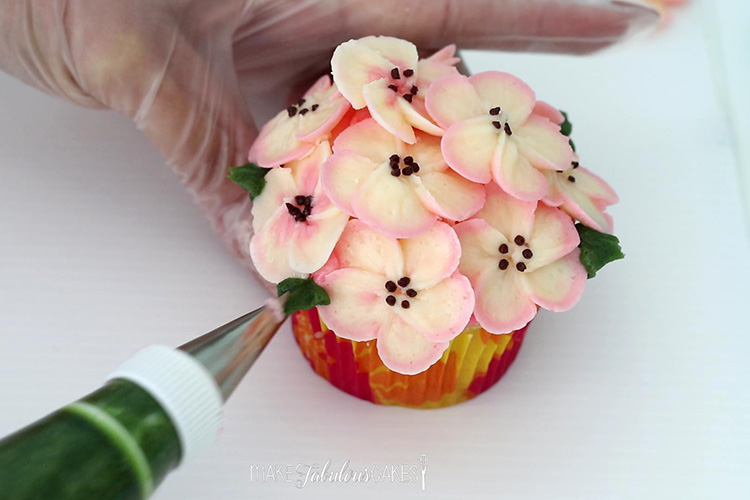
Once the flowers were firm, I arranged them on top of the cupcake, using more buttercream as my “glue” to attach the flowers.
Because these flowers were thin, they would get soft fast, so I had to place them back in the freezer a few times when I felt they were getting softer.
Once all the blossoms cover the cupcake, I finished the arrangement with some leaves using tip 352. I used my favourite green gel colour for leaves which is Wilton Moss Green.
Once all the cupcakes are done, I placed them in the fridge to firm up so that they would be easier to handle when I start arranging the bouquet.
Cupcake Bouquet Instructions
To hold the flower cupcakes together, I used a cupcake bouquet box that I got from Kitchen Jukebox. (Note: They only have stock until supplies last, so if you see them available, grab them as they go out fast) This made it sooo easy to create an arrangement of cupcakes.
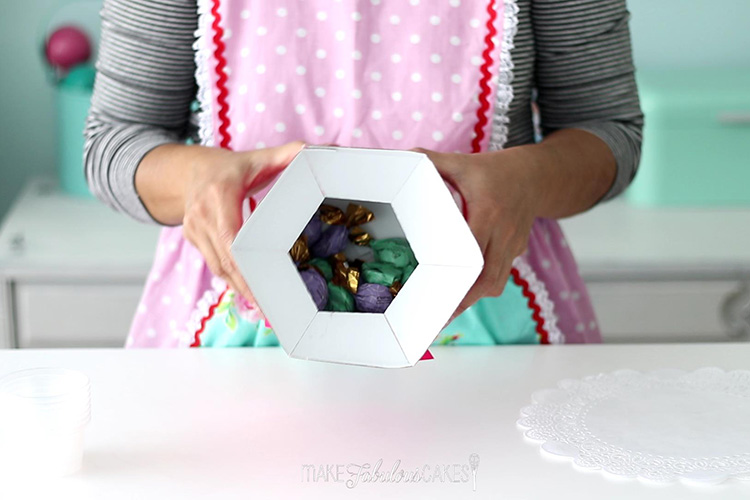
I decided to fill my box with some chocolates because one, I felt that the cupcake will be top heavy, I was afraid that it would be topple over easily. I wanted to counter weight it with something heavy on the bottom. And two, I thought it was such a shame leaving the inside of the box empty. And chocolates did a perfect job!
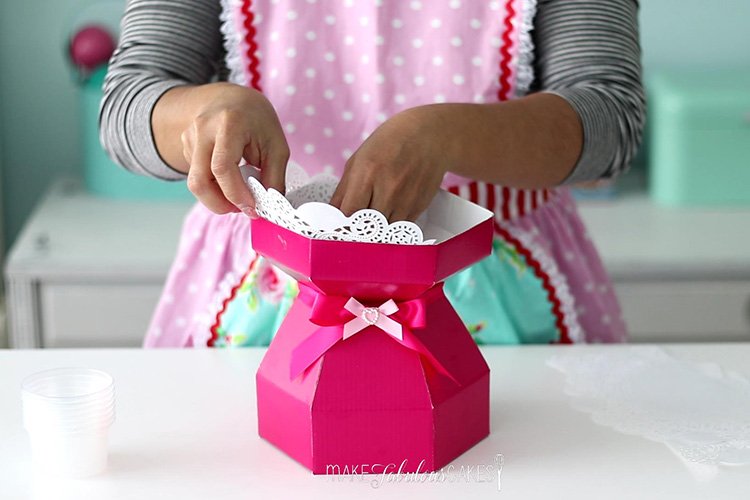
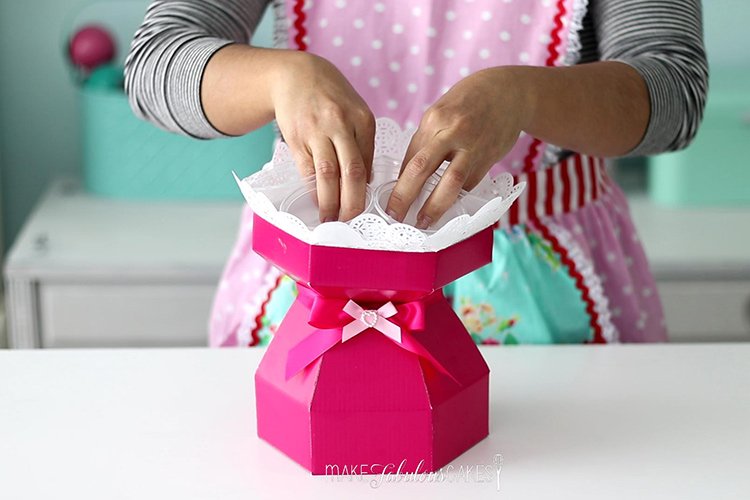
I then cut up 2 paper doilies in half and placed it around the outer rim of the box.
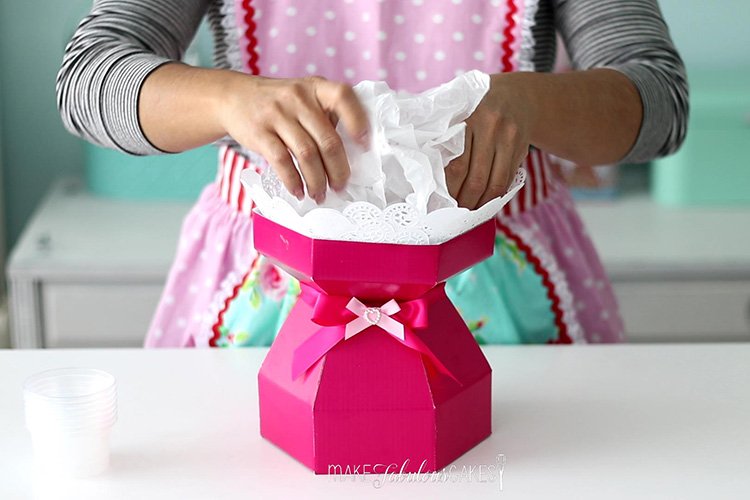
Then I plugged the hole with some crumpled tissue paper. This will also help cushion the cupcakes and prevent it from falling into the hole.
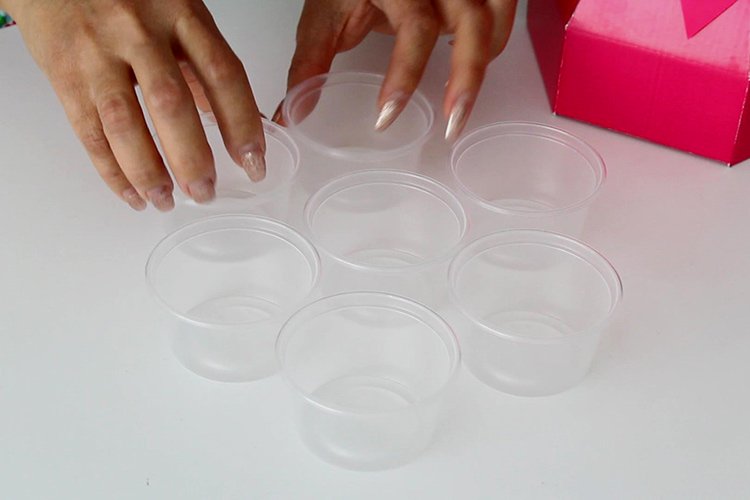
This box contains 7 cupcake holders and the trick to placing them on the box is to arrange them as below, with one cup in the center surrounded by the other cups.
Then I had to take them all at the same time and place it together on the top of the box.
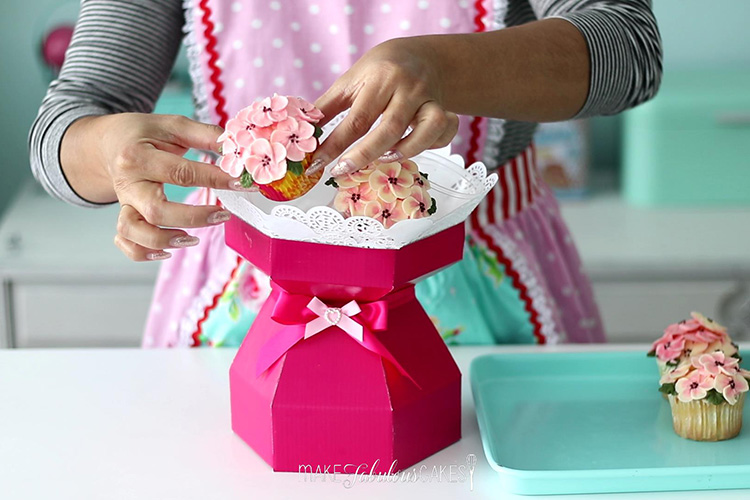
Then I dropped in the now firm cupcakes into the holders and voila the cupcake bouquet is done!
You can get really fancy with decorating the box with some ribbons and bows.
Now, wouldn’t you want to get a bouquet of flowers like these?
This bouquet of buttercream flowers is not just for Valentines, but it is also perfect for Mother's Day, birthdays or any other special occasions.
Hope you enjoyed this tutorial :)
Happy V,

Easy Cupcake Bouquet Tutorial Top
- Home Page
- Flower Cakes
- Cupcake Bouquet
The images, tutorials and content on make-fabulous-cakes.com are protected by copyright laws. DO NOT distribute or copy the content without written permission. DO NOT edit, crop, or remove watermarks from any image or video. If you intend to use any of the text, templates or images within, it must be linked back to this site with credit given to www.make-fabulous-cakes.com. For questions contact us HERE.
Disclosure: Please note some of the links in this post may be affiliate links, I will earn a commission if you decide to make a purchase. This doesn’t cost you anything additional and I truly appreciate this support, thank you!
