Daffodil Cake
- Home Page
- Cake Recipes
- Daffodil Cake Recipe
THIS POST MAY CONTAIN AFFILIATE LINKS, WHICH MEANS I’LL RECEIVE A COMMISSION IF YOU PURCHASE THROUGH MY LINKS, AT NO EXTRA COST TO YOU. PLEASE READ PRIVACY POLICY AND DISCLOSURE FOR MORE INFORMATION.
Sweet
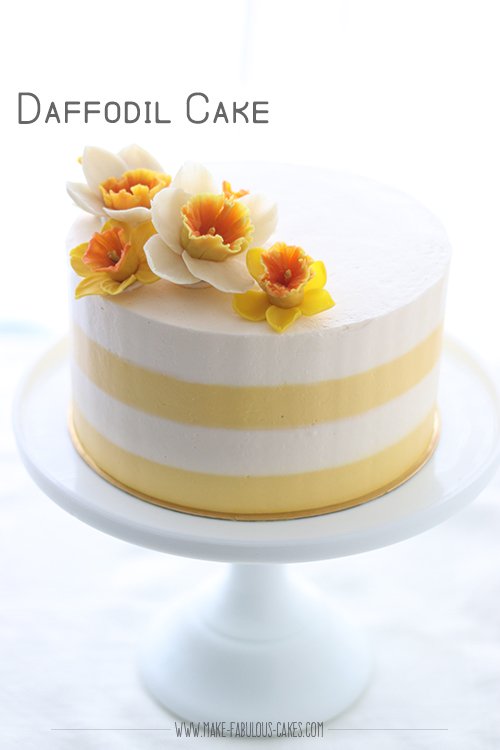
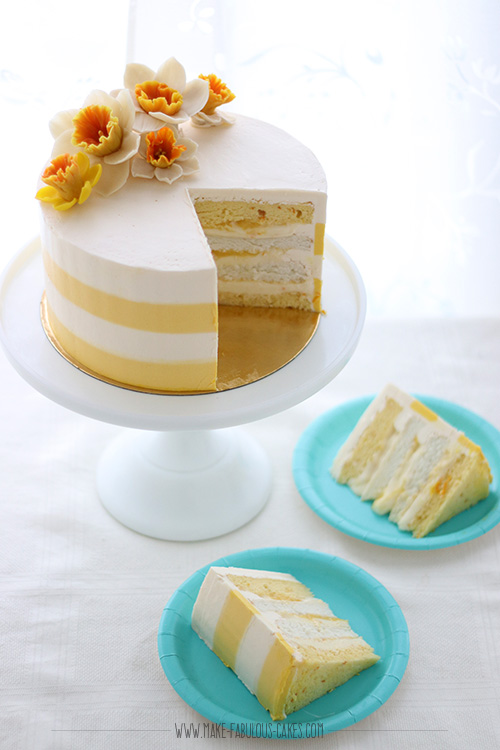
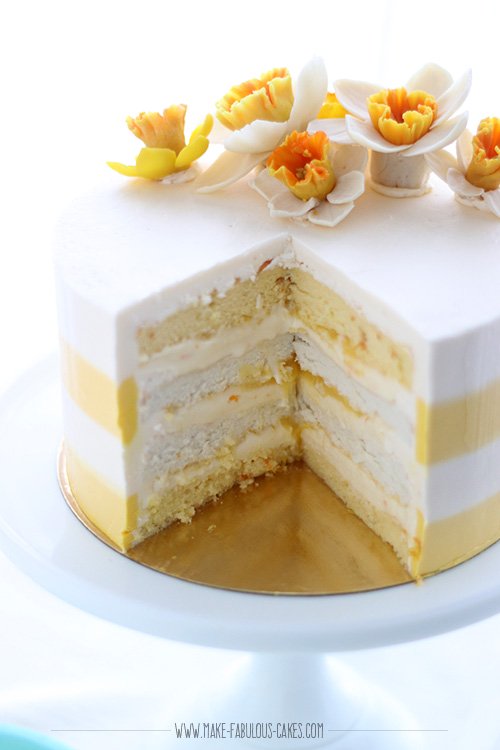
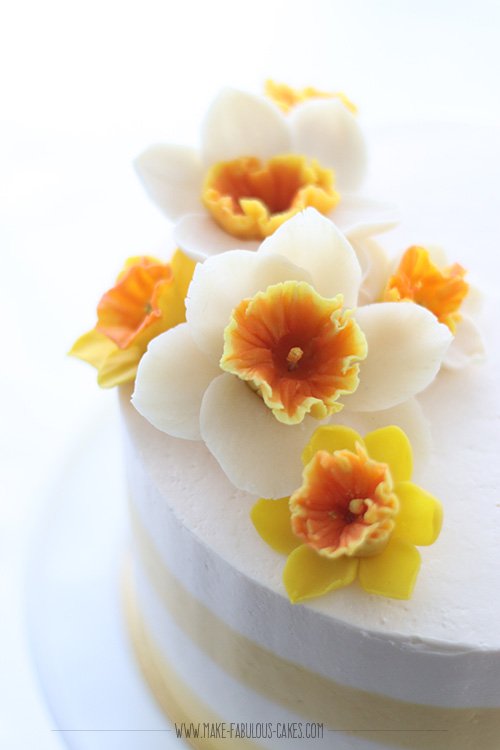
and tangy, my version of the Daffodil Cake is composed of layers of sponge and
angel cake filled with orange cream cheese frosting and lemon curd finished with bean
paste flower daffodils. It is the perfect
cake for spring and to celebrate Mother’s Day with.
Spring has been very elusive to us east coast people this year and finally, yes finally, it is starting to feel like summer is just around the corner.
For Mother’s Day I wanted to make a cake decorated with something bright that would represent my current bright mood brought on by this good weather.
Yes, I am one of those people who get affected by whether it is sunny or not outside. When it's cold and gray outside, I just want to hibernate and lock myself indoors. This winter I felt like I hibernated too, too long. It is time to celebrate the warmer days to come.
I decided I want to make a cake decorated with daffodils. When I Googled “daffodil cake” for some design inspiration, the search came up with recipes for a Daffodil Cake.
Huh... Who knew there is actually a recipe for a daffodil cake!
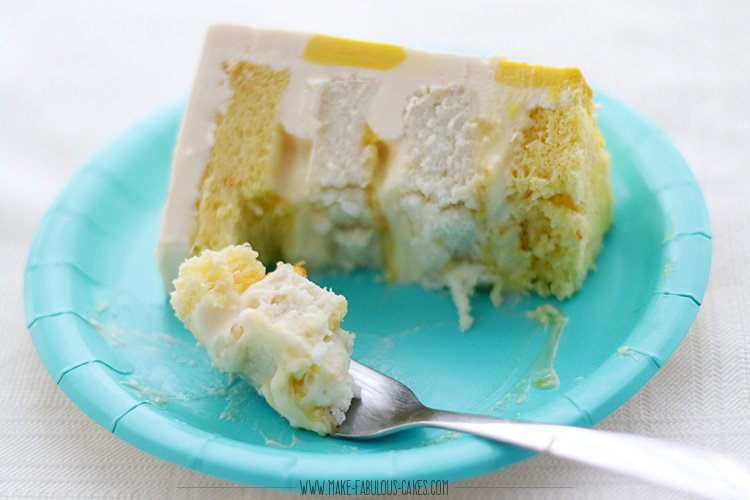
So, a daffodil cake is actually a vintage cake recipe. It is both an angel cake and a sponge cake swirled together and usually baked in a bundt or angel cake pan. I’ve seen variations of the recipe, some are flavoured with orange, some with lemon, some are glazed and some are frosted.
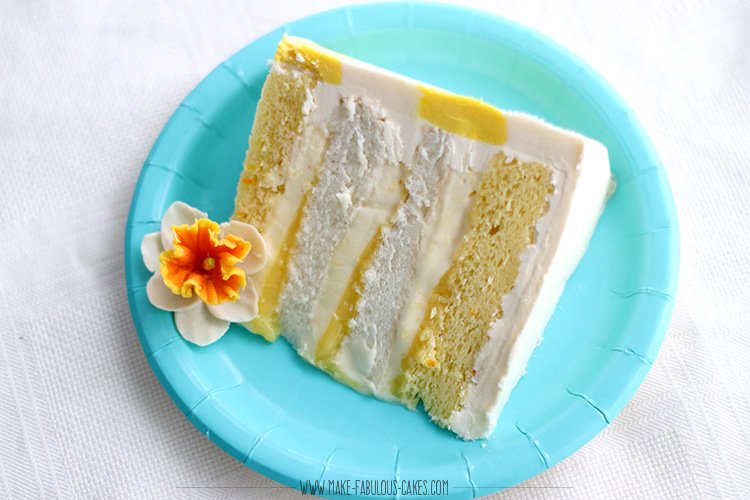
I debated if I wanted to bake the cake in a bundt pan because I really wanted to make a layered cake. So what I ended up doing was I deconstructed the daffodil cake and made separate layers of sponge and angel cake.
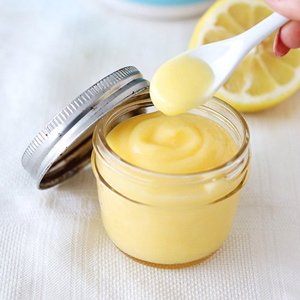
I also couldn’t decide between orange or lemon flavour. I ended up using both as fillings. I use orange with the cream cheese frosting and since there were leftover egg yolks from make the cake, I decided to use it to make lemon curd.
Let me tell you, the airiness of the sponge and angel cake layers is balance out the rich cream cheese/lemon curd filling, the flavours are bright and pure delight. I’m so happy in how it turned out!
For decoration, of course I wanted to put some daffodils on top of the cake. At first I thought I was going to make it out of buttercream. But I decided to use another medium – bean paste.
I’ve been playing with this medium lately and I must say I kinda like it. It is similar to gum paste but it uses natural ingredients and not much sugar. What I like about it is that the colours blend beautifully and it has a nice translucency to it that it makes the flowers look more realistic.
In the tutorial I used bean paste but I think it could easily translate to gum paste. I have another tutorial for daffodil using gum paste here.
I am currently putting together a class on bean paste flowers as I had so many requests for it on my Instagram and Facebook accounts. So keep an eye out if you are interested ;)
In the mean time here is a video tutorial on how to make a bean paste daffodil.
*Does not print in Chrome browser; pls. print in Mozilla or Internet Explorer.*
Daffodil Cake Recipe
INGREDIENTS
SPONGE AND ANGEL CAKES
1/2 c. sugar
1 c. cake flour
12 large egg
whites
1 tbsp. fresh
lemon juice
1/4 tsp. salt
1 tsp. vanilla
extract
3/4 cup sugar
6 large egg yolks
1/4 cup sugar
1 tbsp. orange
juice
2 tsp. orange zest
1/2 tsp. orange
extract
ORANGE CREAM
CHEESE FROSTING
8 oz cream cheese
1/2 cup butter,
room temp
3 cups of icing
sugar
2 tbsp orange
juice
1 tsp orange zest
LEMON CURD
6 egg yolks
1 cup sugar
1/2 cup fresh
lemon juice
1/2 cup butter,
cold
1 tbsp lemon zest
1 RECIPE OF ITALIAN MERINGUE BUTTERCREAM
METHOD
SPONGE AND ANGEL CAKES
Preheat oven to 350F. Line two 8” pans with parchment paper.
Sift the 1/2 cup of sugar with cake flour. Set aside.
Whisk together the egg whites, lemon juice and salt until soft peaks form.
Slowly add in 3/4 cup of sugar, a tablespoon at a time and whisk until stiff peaks form. Add in the vanilla.
Sift a third of the flour mixture over the eggwhites and carefully fold it in. Repeat again two more times until flour mixture is well incorporated.
In another bowl whisk the eggyolks with 1/4 cup of sugar for about 3 minutes until light and creamy. Mix in the orange juice, zest and extract.
Take half of the eggwhite mixture and carefully fold it in the eggyolk mixture.
Take each mixture and pour it each in its pan and bake for about 40 minutes. The cake is ready when an inserted wooden skewer or cake tester comes out clean or when cake springs back when lightly pressed with a finger.
Take the cakes out of the pan immediately and loosen the sides with a knife or metal spatula and invert to a metal rack. Invert again to another rack to prevent the cake from splitting.
Cool completely.
ORANGE CREAM CHEESE FROSTING
Whip together cream cheese and butter until smooth
Add in the icing a cup a time. Start with a slow speed to avoid making a mess with the icing sugar. Mix until all sugar has been added
Scrape bowl. Mix in the orange juice, zest and extract.
LEMON CURD
In a small sauce pan, whisk together egg yolks, sugar and lemon juice over low heat. Stir constantly until mixture is thick and coats the back of the spoon.
Strain the mixture thru a sieve.
Add in the cold butter (this brings the temperature down) and stir until melted.
Stir in the zest and refrigerate until cold. Keep leftovers refrigerated.
CAKE ASSEMBLY:
Cut the cakes in half using a serrated knife.
Place a layer of the sponge cake (yellow cake) on the cake board. Place some of the buttercream inside a pastry bag with a couples. Pipe a dam of buttercream all around the sides of the cake.
Add in about a cup of the orange cream cheese frosting and spread with a small spatula. Add in 2-3 tablespoons of the lemon curd on top of the frosting and spread using the small spatula.
Place a layer of the angel cake (white cake) and add in another layer of the cream cheese frosting and lemon curd.
Repeat with another layer of angel cake, cream cheese frosting and lemon curd.
Add the last layer of sponge cake on top.
Refrigerate the cake for about 30 minutes to firm it up. (If you work on it right away, the cake will be a bit wiggly because of the soft fillings.)
Crumb coat the cake with a thin layer of frosting.
BUTTERCREAM STRIPES
To get the buttercream stripes on the side of the cake, place uncoloured buttercream and yellow coloured buttercream in pastry bags fitted with a couple.
Pipe two rows of yellow buttercream on the bottom of the cake. Then pipe another two rows of uncoloured buttercream. Repeat alternating the colours until you reach the top of the cake. Use the same colour of the last row of buttercream on the top of the cake.
Smooth the sides of the cake using a bench scraper.
Smooth out the top using an angled metal spatula. Decorate as desired.
Daffodil Cake Recipe ⬆
- Home Page
- Cake Recipes
- Daffodil Cake Recipe
THIS POST MAY CONTAIN AFFILIATE LINKS, WHICH MEANS I’LL RECEIVE A COMMISSION IF YOU PURCHASE THROUGH MY LINKS, AT NO EXTRA COST TO YOU. PLEASE READ PRIVACY POLICY AND DISCLOSURE FOR MORE INFORMATION.
The images, tutorials and content on make-fabulous-cakes.com are protected by copyright laws. DO NOT distribute or copy the content without written permission. DO NOT edit, crop, or remove watermarks from any image or video. If you intend to use any of the text, templates or images within, it must be linked back to this site with credit given to www.make-fabulous-cakes.com. For questions contact us HERE.
Disclosure: Please note some of the links in this post may be affiliate links, I will earn a commission if you decide to make a purchase. This doesn’t cost you anything additional and I truly appreciate this support, thank you!
