Trendy Wedding Shower Cake
- Home Page
- Bridal Shower Cakes
- Wedding Shower Cake
THIS POST MAY CONTAIN AFFILIATE LINKS, WHICH MEANS I’LL RECEIVE A COMMISSION IF YOU PURCHASE THROUGH MY LINKS, AT NO EXTRA COST TO YOU. PLEASE READ PRIVACY POLICY AND DISCLOSURE FOR MORE INFORMATION.
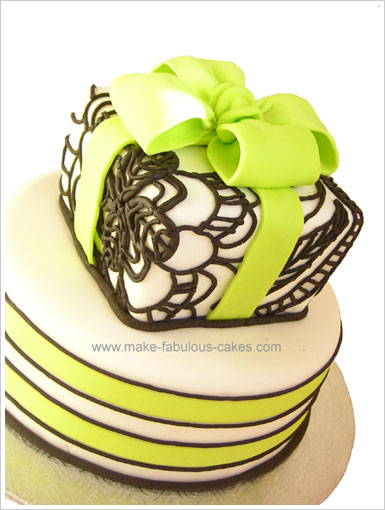
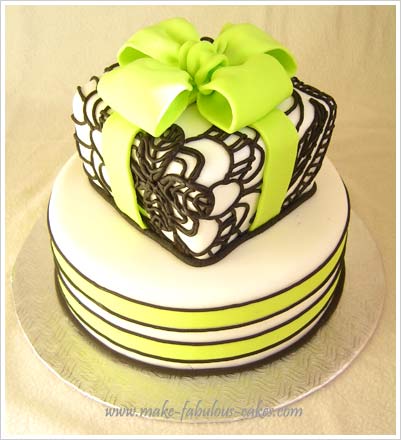
I was so excited when I was commissioned to make a wedding shower cake for my dear friend. I've been dying to make this trendy cake that I had doodled in my sketchbook for a while.
I get inspired by a lot of things that I see and being cake obsessed that I am, I somehow find a way to incorporate it into a cake design. The design for this cake was inspired by a bedroom that was featured in an interior design magazine.
The main colors of the room was black and lime green and I used those as the colors of the wedding shower cake. The pattern on the top tier of the cake was actually inspired by the pattern of the pillows on the bed.
Because the pattern on the top tier was already overwhelming, I made the design on the bottom tier much simpler with a band of green fondant ribbon with black edges. Drawing it on paper was the easy part, executing it - not so easy.
It was a bit difficult making the band around the cake straight. But I will show in the tutorial below an easy way to making it as straight as possible.
INSTRUCTIONS FOR THE TRENDY WEDDING SHOWER CAKE
For this wedding shower cake I used 2 layers of 10" round cakes for the bottom tier and 2 layers of 6" square cakes for the top tier. Both cakes frosted in buttercream and covered with white fondant. Stack the 6" square cake on top 10" round cake using support dowels (either wood or plastic).
Make the bow ahead of time using lime green fondant. Make four loops for the bow and let dry ar least overnight.
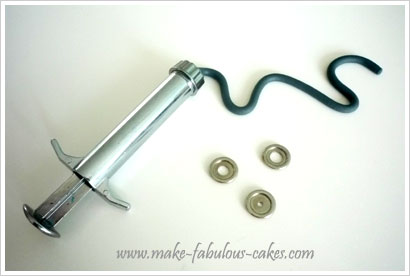
I used a clay extruder with different sizes of round dyes to make the pattern on the top tier.
Some of the designs on the pattern (like the flower part) I would make it first flat on the working surface then transfer it on the cake. Some of the black patterned design I would apply directly on the cake. Use water or lemon extract to attach the black strings of fondant.
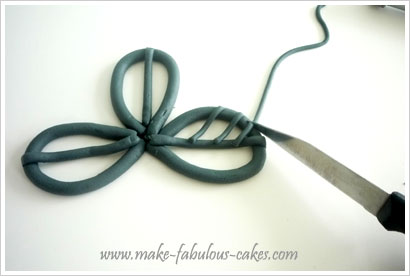
Finished off the top tier with green fondant ribbons on each side of the cake and top with the fondant bow.
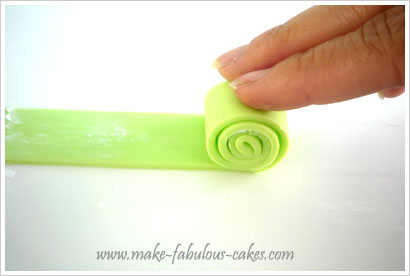
For the band of green fondant on the bottom tier, roll the fondant thin and long. Using a ruler and pastry/pizza wheel, cut the fondant 1" wide and the length should be the circumference of the 10" cake. Dust with cornstarch and roll it in.
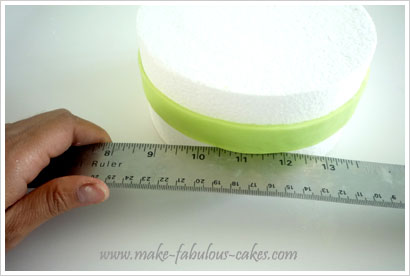
Place the rolled fondant against the side of the cake. To make it easier, place the cake on a turntable and turn the it slowly as you unroll the fondant ribbon on the side of the cake.
At this point the green band will not be straight but this is easy to fix. Just press a ruler on the bottom and top part of the green fondant. Try to make it straight and level as much as possible.
I have heard of cake decorators using a laser level as a guide to make things straight on their cakes. I do not have this tool but if you do have it, then go ahead and use it!
Use the clay extruder to pipe the black edges on both sides of the green fondant.
And voila a fun and trendy wedding shower cake!
Trendy Wedding Shower Cake Top
- Home Page
- Bridal Shower Cakes
- Wedding Shower Cake
The images, tutorials and content on make-fabulous-cakes.com are protected by copyright laws. DO NOT distribute or copy the content without written permission. DO NOT edit, crop, or remove watermarks from any image or video. If you intend to use any of the text, templates or images within, it must be linked back to this site with credit given to www.make-fabulous-cakes.com. For questions contact us HERE.
Disclosure: Please note some of the links in this post may be affiliate links, I will earn a commission if you decide to make a purchase. This doesn’t cost you anything additional and I truly appreciate this support, thank you!
